A $2,000 postcard campaign with the wrong address format costs you everything. Small mistakes in file preparation, color profiles, or USPS compliance turn profitable direct mail into expensive recycling. In 2026, businesses using postcard printing and mailing services need systematic checkpoints from initial concept to delivery confirmation. Here’s the complete checklist that prevents costly errors and ensures your campaign reaches mailboxes ready to convert.
Why Checklists Prevent Costly Direct Mail Mistakes
Postcard campaigns fail in predictable ways. For instance, design files get rejected for incorrect bleed settings. Additionally, proofs get approved with misspelled phone numbers. Meanwhile, mailing lists include undeliverable addresses. Each error adds 7-14 days to your timeline and drains budget with reprints and delays.
Professional postcard printing and mailing services handle complex specifications, but they can’t read your mind. Your printer needs correctly formatted files meeting their equipment requirements. Similarly, your mail house needs clean data matching USPS® standards. Your designer needs clear objectives before creating layouts. Therefore, gaps in communication create expensive mistakes.
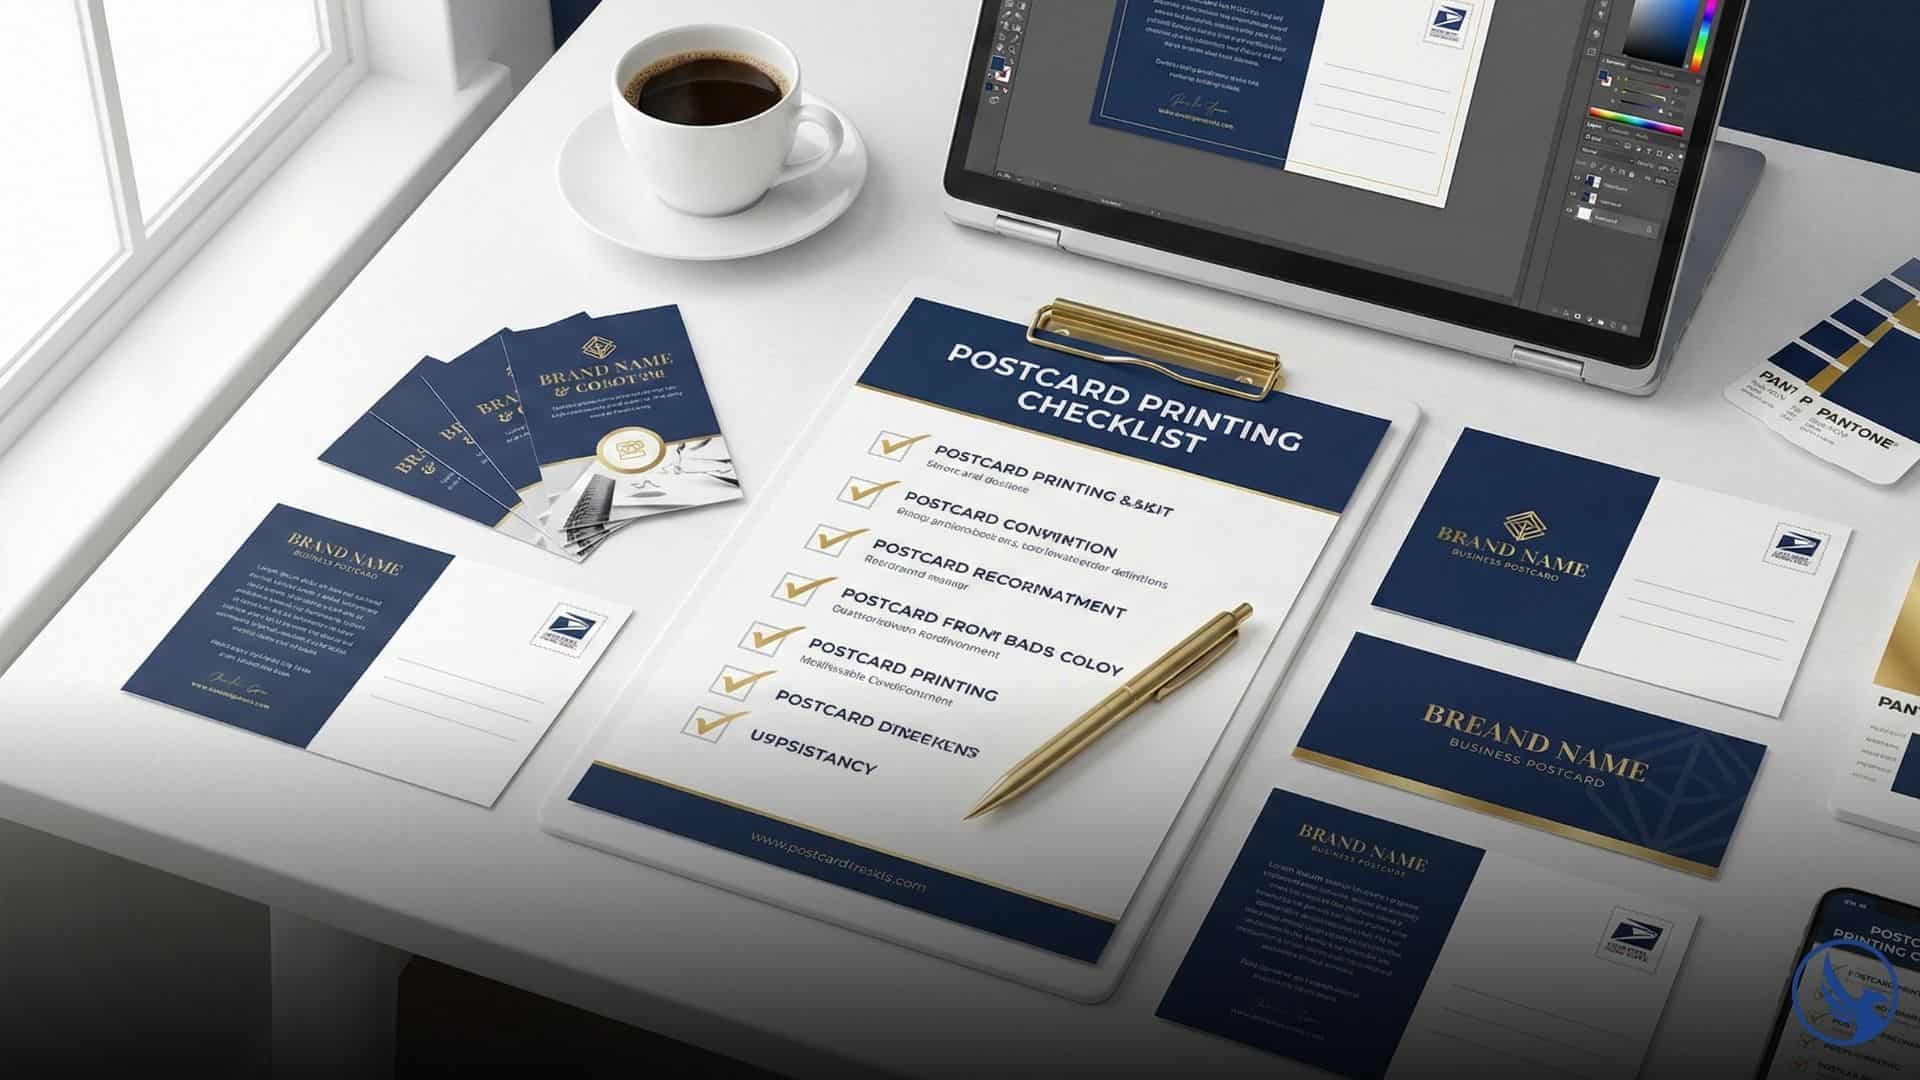
Postcard campaigns involve dozens of discrete decision points from strategy to delivery. Consequently, missing even a few of them means your campaign underperforms. Miss several and you’re starting over with reprints. A checklist eliminates guesswork and creates accountability across your team. For visual guidance on the complete process, see our checklist visual guide.
Small businesses suffer most from checklist failures. In contrast, large companies have marketing departments that know postcard specifications by memory. Solo entrepreneurs running their first direct mail campaign face dozens of technical requirements without context. For example, one wrong selection in a print menu—choosing RGB instead of CMYK, uploading 72 DPI images instead of 300 DPI—tanks the entire project.
Time compression kills campaigns. Consider this scenario: you need postcards in mailboxes by December 1st for holiday promotions. However, you start design on November 15th. Rush fees and limited proofing windows force compromises. In contrast, a checklist started 45 days before mail date prevents crisis mode and improves outcomes.
Pre-Design Checklist: Strategy and Planning for Printing Services
Successful postcard campaigns begin before design software opens. First and foremost, these strategic decisions shape every downstream choice.
Define Campaign Objectives
What specific action should recipients take? “Visit our website” fails because it’s unmeasurable. On the other hand, “Schedule a consultation by calling 845-555-0100” succeeds because you can track calls. Similarly, “Redeem this postcard for 20% off by January 15th” works because it’s concrete and time-bound.
Your objective determines design priorities. For instance, lead generation campaigns need large phone numbers and QR codes. Meanwhile, retail promotions need bold offers and store locations. Event invitations need dates, times, and RSVP methods. Clarity here prevents design revisions later.
Set measurable targets: response rate percentage, total conversions, cost per acquisition, revenue per campaign dollar. If you can’t measure success, you can’t optimize future mailings. For comprehensive benchmarks, see our postcard printing response rate statistics.
Identify Target Audience
Who receives this postcard? “Everyone in our city” wastes money on unqualified prospects. Instead, “Homeowners within 3 miles of our location, household income $75K+, ages 35-65” focuses resources on likely buyers.
Audience definition affects list acquisition, message tone, offer structure, and visual design. For example, a postcard targeting retirees needs larger text and conservative imagery. In contrast, a postcard targeting young professionals needs bold colors and mobile-first thinking (QR codes, not lengthy URLs).
Document your ideal recipient in detail: demographics, psychographics, buying behaviors, pain points, objections. As a result, your designer and copywriter need this brief to create relevant content.
Select Mailing List Source
Three list options serve different needs: in-house customer lists, purchased demographic lists, or EDDM® (Every Door Direct Mail®) saturation mailing.
In-house lists of past customers deliver response rates of approximately 9.0% according to the ANA 2018 Response Rate Report, though with limited scale. Meanwhile, purchased lists offer precise targeting (geography, income, age, home value) at $50-150 per thousand names, with prospect list response rates around 4.9%. EDDM blankets entire zip codes or carrier routes without buying names—lower per-piece postage cost but typically lower response rates. For detailed EDDM cost analysis, see our comprehensive breakdown.
Verify list accuracy before committing. Specifically, request sample data showing name format, address structure, and available fields. Lists older than 12 months may include 10-20% bad addresses due to moves, business closures, and data decay. Therefore, budget for list scrubbing services ($10-30 per thousand) that remove undeliverables.
Determine Postcard Size and Quantity
Standard sizes control costs and USPS® compliance:
4″×6″: Qualifies for postcard rate ($0.61 as of July 2025), fits standard templates, lowest printing cost, works for simple offers
6″×9″: Qualifies for same postcard rate ($0.61 as of July 2025), stands out in mailbox, allows more content. Since the 2021 USPS postcard size update, postcards up to 6″×9″ qualify for First-Class Mail® postcard rates—same postage as 4″×6″ but higher printing costs.
6″×11″: Maximum visual impact, complex designs possible, requires letter-rate postage ($0.78)—28% more than postcard rate
Quantity affects per-piece pricing dramatically. For instance, 500 postcards cost $0.50-0.70 each. However, 5,000 postcards drop to $0.20-0.30 each. Furthermore, 10,000+ postcards reach $0.15-0.20 each. For complete postcard printing cost breakdowns, quantity thresholds dramatically impact per-piece pricing. Order volume based on list size plus 5-10% extras for testing and corrections.
Match size to complexity. Simple promotions fit 4″×6″. Product catalogs or multi-offer campaigns benefit from 6″×9″ visibility at the same postage cost. Restaurant grand openings with menus, maps, and coupons may justify 6″×11″ despite higher postage.
Design Phase Checklist: Files and Specifications
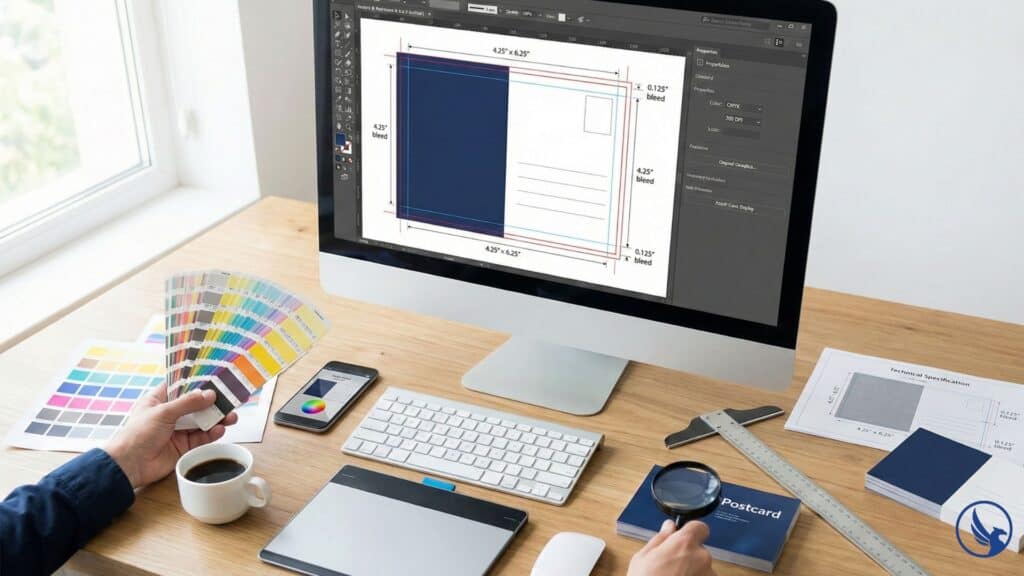
Design errors cause many postcard campaign delays. Therefore, these checkpoints ensure printer-ready files that produce expected results. For file preparation examples, see visual specifications.
Establish Correct Dimensions and Bleed
Your postcard file must include bleed—extra image area beyond final trim size. Standard bleed is 0.125″ (1/8″) on all sides. Consequently, a 4″×6″ postcard requires 4.25″×6.25″ design file.
Why? Printing and cutting machines have microscopic variance. As a result, bleed ensures your background color or image extends to the edge after trimming. Without bleed, you risk white borders or cut-off content.
Set safe zones 0.25″ inside trim edges for critical content. Therefore, phone numbers, addresses, QR codes, and body copy must stay inside safe zones. Content in bleed zones may get trimmed. For detailed specifications, see our USPS postcard printing requirements guide.
Use CMYK Color Mode
Design in CMYK (cyan, magenta, yellow, black) color mode, not RGB (red, green, blue). Monitors display RGB. However, printers use CMYK. Converting RGB to CMYK during printing shifts colors unexpectedly—your bright screen blue becomes dull printed blue.
Convert all images, logos, and graphics to CMYK before designing. Specifically, check your design software color mode in document settings. If you see “RGB” anywhere, your file will print incorrectly.
Request color swatches or printed proofs from your printer. Screen colors never match printed colors exactly, but working in CMYK minimizes variance. For more guidance on color accuracy and management, Adobe provides comprehensive resources.
Verify Image Resolution
All images need 300 DPI (dots per inch) at final printed size. Web images at 72 DPI look sharp on screens but print blurry and pixelated. Similarly, stock photos need high-resolution downloads, not preview thumbnails.
Check resolution by opening images in Photoshop or similar software. If the DPI shows below 300, the image won’t print clearly. Either find higher-resolution versions or redesign around different images.
Enlarging low-resolution images doesn’t work. Scaling a 72 DPI image up doesn’t create detail—it magnifies blur. Instead, shoot original photography at high resolution or purchase print-quality stock images.
Typography and Readability Standards
Choose Legible Fonts at Appropriate Sizes
Body copy needs 10pt minimum for comfortable reading. Meanwhile, headlines should use 24-36pt depending on postcard size. Contact information requires 12-14pt so recipients don’t strain to read phone numbers.
Avoid decorative fonts for body copy. Script fonts and elaborate display faces reduce readability at small sizes. Use clean sans-serif or serif fonts for text blocks. Save decorative fonts for short headlines or accent text.
Limit your design to two font families maximum. More fonts create visual chaos and amateur appearance. In contrast, professional postcards use one font for headlines, another for body copy, with variations in weight (bold, regular, light) for hierarchy.
Ensure Sufficient Contrast
Black text on white background offers maximum readability. However, light gray text on white fails—recipients won’t strain to read your message. Similarly, dark text on dark backgrounds disappears. Test contrast by printing drafts on a standard office printer. If it’s hard to read in the printout, it’s worse on glossy cardstock.
Colorful backgrounds require careful text treatment. Therefore, use solid color blocks behind text to ensure readability. Drop shadows or outlines help text pop against busy images, but use sparingly—they clutter designs quickly. For comprehensive guidance on avoiding common design mistakes, see our detailed checklist.
Proofing and Pre-Press Checklist: Catching Errors
Proofing separates amateur campaigns from professional results. Therefore, these checks happen after design completion, before files go to the printer.
Content Accuracy Review
Spell-check everything, then manually review every word. Automated spell-checkers miss context errors: “Your invited” passes spell-check but should be “You’re invited.” Phone numbers, addresses, URLs, and dates need manual verification.
Print proofs at actual size and review in bright light. Errors invisible on screens jump out on paper. Additionally, have three people proof independently—you’ll miss typos in your own writing.
Call the phone number. Visit the URL. Verify the address in Google Maps. Confirm dates against calendars. Simple verification prevents disasters like printing last year’s dates or disconnected phone numbers.
File Format and Export Settings
Save final files as PDF with these settings:
- CMYK color mode
- 300 DPI resolution
- Fonts embedded or converted to outlines
- Crop marks and bleed indicators on
- High-quality compression (not web optimization)
Printers reject files with missing fonts, RGB color, low resolution, or incorrect dimensions. Therefore, export a PDF, open it in Acrobat or preview software, and zoom to 200-300%. Blurry elements indicate resolution problems.
Request your printer’s specific export specifications. Some prefer packaged InDesign files with linked images, others want flattened PDFs. Following their exact requirements prevents rejection and delays. According to USPS technical specifications, proper file preparation ensures smooth processing.
Order Physical Proofs
Digital proofs on screen never match printed results. Therefore, order physical proofs ($15-50 depending on printer) showing actual colors, paper stock, and coating. Approve physical proofs before authorizing full print runs.
Check coating effects: UV coating adds gloss but can make text harder to read. Matte coating feels premium but shows fingerprints. Uncoated stock offers natural texture but absorbs ink differently.
Review under multiple lighting conditions. Fluorescent office lights, natural sunlight, and indoor evening lighting all affect color perception. If your postcard looks wrong in any lighting, request color adjustments.
When to Request Professional Postcard Printing and Mailing Services
While this checklist guides DIY postcard campaigns, many small businesses reach a complexity threshold where professional support delivers better ROI than self-management. If you’re coordinating multiple mailings simultaneously, managing campaigns across different markets, or running time-sensitive promotions where mistakes cost thousands, professional postcard printing and mailing services eliminate risk.
Most businesses discover they need professional help around their third or fourth campaign. You’ve proven the concept works, identified your target audience, and validated your offer. Now you need reliable execution at scale without consuming internal bandwidth. Additionally, design revisions, file preparation, list management, and USPS® compliance become time sinks that pull you away from running your business.
Postcard printing and mailing services handle the entire workflow: design consultation, file preparation, color proofing, list acquisition and scrubbing, printing, addressing, and USPS® delivery. You approve designs and review samples, but the technical execution—CMYK conversion, bleed settings, barcode placement, presort optimization—happens without your involvement. As a result, campaign timelines compress from 45 days to 14 days because professionals manage concurrent workflows efficiently. For high-volume campaigns, see our bulk postcard printing with mailing service options.
Ready for hands-off execution? Request a detailed quote for your postcard printing and mailing project. Our team reviews your campaign goals, target audience, mailing volume, and delivery timeline to provide accurate pricing and execution schedules. Whether you’re mailing 500 postcards to a local neighborhood or 50,000 across multiple markets, professional guidance ensures your checklist gets executed flawlessly.
Call 845-255-5722 to discuss your campaign requirements, review our proofing process, or schedule a consultation on list acquisition strategies and postage optimization.
Mailing and Distribution Checklist: USPS Compliance
Perfect design means nothing if postcards don’t reach mailboxes. USPS® rules govern addressing, sizing, and mailing procedures. For comprehensive USPS compliance guidance, see our visual standards reference.
Address Formatting Standards
USPS® requires specific address formats:
Recipient name (line 1)
Street address or PO Box (line 2)
City, State ZIP+4 (line 3)
All caps, no punctuation
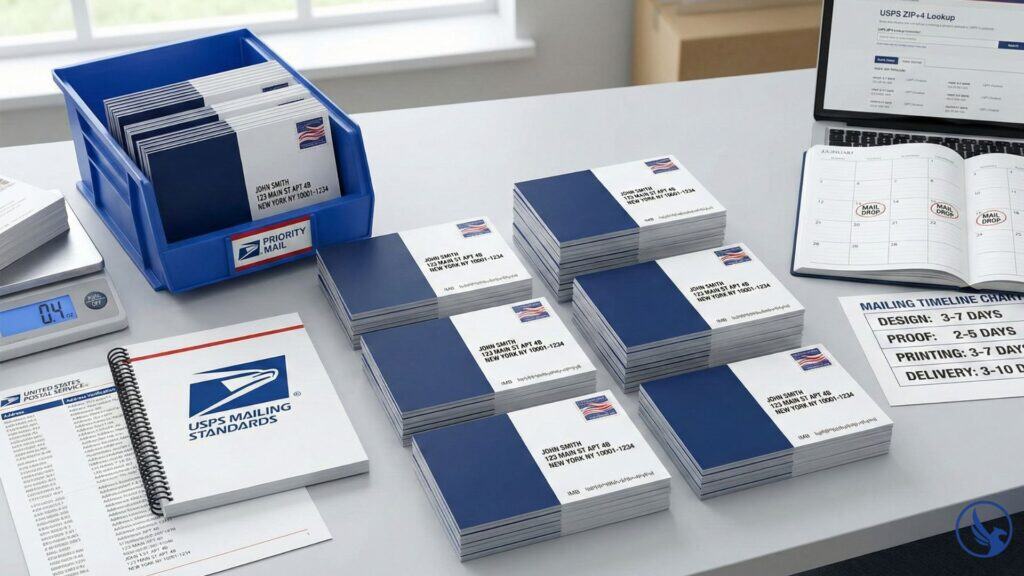
Wrong format: “123 Main Street, Apartment 4B, New York, NY 10001”
Right format: “123 MAIN ST APT 4B / NEW YORK NY 10001-1234”
Use USPS ZIP+4 lookup tools to verify complete addresses. The 4-digit extension improves deliverability and may reduce postage costs through presort discounts.
Barcode and Indicia Placement
EDDM® postcards need specific layout: address block in lower right corner, postage indicia in upper right corner, barcode clear space in lower right (at least 5/8″ × 4.25″).
Standard mailings using purchased lists require IMB (Intelligent Mail Barcode) if you want tracking and presort discounts. Your mail house handles barcode generation, but your design needs clear space reserved.
Avoid placing graphics, text, or decorative elements within 1″ of the address area. USPS® automated sorting equipment reads this zone—interference causes misreads and delivery failures.
Presort and Postage Optimization
Bulk mailings qualify for discounted postage if sorted by ZIP code and delivered to USPS® in trays. Presort services ($0.03-0.07 per piece) handle sorting and USPS® paperwork.
First-Class® presort delivers in 1-3 days locally, 2-5 days nationally. Meanwhile, Marketing Mail® delivers in 3-14+ business days but costs 30-40% less. Choose based on campaign urgency and budget. According to USPS Business Mail 101 standards, presort discounts can save 15-30% on postage costs. For campaign measurement, implement proper direct mail postcard tracking methods.
Include “Return Service Requested” in your indicia area. USPS® returns undeliverable mail with forwarding addresses, helping you clean your list for future campaigns.
Mail Drop Timing
Calculate mail date working backward from your campaign deadline:
- Marketing Mail®: 3-14+ business day delivery window
- First-Class®: 1-3 days local, 2-5 days national
- Design and printing: 3-7 days
- Proofing: 2-5 days
- List acquisition and cleaning: 5-10 days
For example, a campaign targeting December 15th delivery needs design started by November 20th. Holiday mail volume slows delivery—add buffer days for campaigns during November-December or April (tax season).
Mail mid-week for best deliverability. Specifically, Tuesday-Wednesday drop dates land postcards Thursday-Monday, avoiding weekend delivery where mail sits unseen. Avoid Friday mail drops—postcards arrive Monday when recipients discard weekend accumulation.
Start Your Postcard Printing and Mailing Campaign
Checklists eliminate guesswork and expensive mistakes. Your campaign succeeds through systematic preparation, not luck or inspiration. Furthermore, each checkpoint protects your investment and improves results.
Work through these checklists in order. Skipping steps or working out of sequence creates gaps that surface as problems during printing or mailing. Strategy before design. Design before proofing. Proofing before mailing.
Professional postcard printing and mailing services execute your vision, but they need correct inputs. Therefore, your checklist ensures those inputs arrive complete, accurate, and printer-ready.
For the complete breakdown of specifications, templates, and best practices, see our Postcard Printing and Mailing Services Guide.