
The most expensive EDDM mistakes to avoid are the ones that don’t announce themselves until after the press run is complete. A file submitted at the wrong resolution, a postcard trimmed one-eighth of an inch too small, an indicia box placed in the wrong corner, a bundle dropped at the wrong post office — each of these errors produces the same result. Your campaign gets delayed, rejected, or delivered to the wrong audience. The budget you spent on print and postage is partially or entirely unrecoverable.
The Guide that Covers the Full Spectrum of EDDM Errors
From technical file preparation and USPS compliance failures to strategic mistakes that waste budget, even when the mailing goes through without a problem. Catching any one of these before you submit your print file is worth more than any other optimization in the campaign. For the foundational EDDM process overview, see the EDDM Guide at CRST before reviewing this list.
- Full reprint — 100% of print cost repeated
- USPS rejection — campaign delayed 5–10 days
- Missed seasonal window — offer already expired
- No attribution — can’t improve next drop
- Wrong routes — irrelevant audience, no response
- Export PDF/X-1a · 300 DPI · CMYK — 5 min
- Confirm USPS size spec before designing — 2 min
- Drop at correct ZIP post office — plan ahead
- Add dedicated phone + QR — no extra cost
- Filter routes by income + age — free USPS tool
Category 1 — File and Design Errors
Incorrect Resolution and Color Mode
The two most common prepress file errors in EDDM postcard submissions are resolution and color mode. Print requires a minimum resolution of 300 DPI (dots per inch) at the final print size. Images that look sharp on screen — where 72–96 DPI is the standard display resolution — frequently fall far below 300 DPI at print scale. The result is blurry, pixelated output that undermines every design investment you made in the campaign.
Color mode is the second persistent error. Digital screens display color in RGB (Red, Green, Blue). Commercial printing, by contrast, uses CMYK (Cyan, Magenta, Yellow, Black). When you submit an RGB file to a CMYK press, the printer converts it — and colors that appear vivid and accurate on screen frequently shift significantly, particularly deep blues, saturated oranges, and precise brand colors. The fix is simple: export your final print file in CMYK color mode at 300 DPI minimum. However, if you catch this after a press run rather than before, you need a full reprint.
Furthermore, files in incorrect formats — JPEG with compression artifacts, RGB PNGs, low-resolution PDFs — create prepress delays even when the printer catches them before going to press. The standard for EDDM print-ready files is PDF/X-1a: a press-optimized format that flattens transparency, embeds all fonts, and locks color to CMYK. For the complete technical specification, EDDM Printing Requirements is the definitive reference.
Missing or Incorrect Bleed and Safe Zones
Bleed and safe zone errors are the most visually damaging mistakes that survive the prepress stage and appear in the final printed piece. Bleed refers to the extension of background colors, images, and design elements beyond the trim line — typically 0.125 inches on all sides for EDDM postcards. If your design’s background color stops at the trim line rather than extending into the bleed zone, the mechanical variation inherent in commercial cutting produces a thin white edge on some cards. That edge signals amateur production and undermines the entire campaign’s credibility.
Safe zones are the inverse: a 0.25-inch margin inside the trim line where all critical content — headlines, contact information, logos, offer text — must sit. Copy or logos outside the safe zone risk getting cut off during trimming. In a mailing of 5,000 pieces, every one of those cards goes out damaged.
Fixing both errors requires returning to the design file, adjusting the canvas and element placement, re-exporting the PDF, and in most cases restarting the press run. For a complete walkthrough of bleed, safe zone, and indicia placement requirements, EDDM Postcard Design covers the full technical layout framework. Additionally, using vendor-supplied templates — available through CRST and referenced in EDDM Postcard Templates — eliminates bleed and safe zone errors by building the correct specifications into the design canvas before creative work begins.
Wrong Indicia Placement or Format
The USPS indicia — the postage marking that identifies the piece as EDDM mail — must appear in a specific location on the back panel: the upper-right corner, within a reserved clear zone of approximately 1.75×2.5 inches. Design elements inside this zone trigger USPS rejection at the acceptance window. An indicia in the wrong corner, formatted incorrectly, or missing entirely produces the same outcome.
The specific indicia format for EDDM Retail reads: “ECRWSS EDDM” on the first line, “POSTAL CUSTOMER” on the second line, with the permit holder’s name and address, all within a defined type size range. Many first-time mailers either omit the indicia from their design entirely or format it incorrectly from a template that doesn’t match current USPS requirements. Consequently, you must verify indicia format and placement against current USPS specifications — available at usps.com/business/every-door-direct-mail.htm — before submitting any EDDM file to press. Working with a full-service printer like CRST includes indicia review as part of the file verification process.
Category 2 — USPS Size and Format Compliance Errors
Postcard Dimensions Outside EDDM Flat Mail Specifications
EDDM mail qualifies for flat-rate postage only when the physical piece meets USPS “flat” mail dimensional requirements. The minimum size is 6.125 × 11 inches and the maximum is 12 × 15 inches. USPS classifies pieces smaller than the minimum as letter-rate or card-rate mail — they don’t qualify for EDDM flat postage. USPS classifies pieces larger than the maximum as parcels.
The most common dimensional error is a postcard designed at a non-standard size — 8×10, 5.5×8.5, or another format borrowed from a different printing category — that falls outside the EDDM flat specification. In that case, you must either reprint the entire run at a compliant size or mail it through a different, more expensive postage category. For the complete size reference across all common EDDM postcard formats, EDDM Postcard Sizes covers the full range with cost implications at each size. For paper thickness requirements that interact with size compliance, EDDM Paper Stock Options provides the production context.
Piece Thickness and Weight Violations
Beyond dimensional requirements, EDDM flat mail must meet USPS thickness specifications: a minimum of 0.009 inches thick and a maximum of 0.75 inches thick. Most commercial postcard stock options — 14pt and 16pt — fall comfortably within these limits. Thickness violations are rare with standard commercial stocks. However, unusual specialty stocks, multi-layer cards, or pieces with thick adhesive elements can approach or exceed limits.
Weight violations are more practically relevant for businesses mailing on heavy stock with additional inserts or elements. Verify current USPS EDDM flat mail weight limits at usps.com before finalizing any non-standard production specification — USPS updates weight and thickness limits periodically. Standard 16pt postcard stock at any EDDM-compliant size falls well within weight limits. Verification is primarily relevant for unusual production formats.
Category 3 — Postal Submission and Logistics Errors
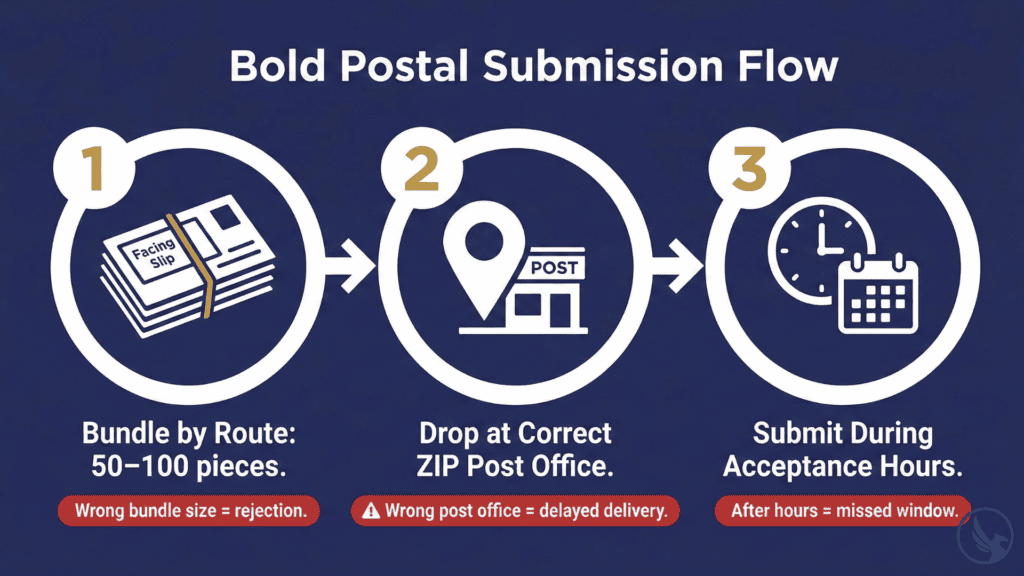
Dropping Bundles at the Wrong Post Office
EDDM Retail requires you to submit bundled mail at the post office that serves the specific carrier routes you are targeting — not the nearest post office to your business and not a central processing facility. If you target ZIP code 12401, drop the bundles at the post office that processes outgoing mail for that ZIP. Dropping at the wrong facility causes redirection. As a result, delivery can slip by days and may miss a time-sensitive campaign window entirely.
For campaigns targeting multiple ZIP codes, sort bundles by ZIP and submit them at the correct post office for each. This logistics requirement is one of the most frequently overlooked by first-time mailers who assume any USPS location will accept their bundles. For a complete walkthrough of the submission process — including bundle sorting, facing slip preparation, and acceptance window procedures — EDDM First Campaign Guide covers every logistical step.
Incorrect Bundle Size and Facing Slip Errors
EDDM Retail requires you to bundle pieces in groups of 50–100 with rubber bands and a USPS-issued facing slip — a small printed form identifying the carrier route and piece count for each bundle — placed on top and visible. USPS rejects bundles without facing slips, with incorrect route information, or outside the 50–100 piece range at the acceptance window.
The USPS EDDM Retail online tool generates the facing slip form at the time of postage payment. Each route requires a separate facing slip with the correct route designation. Consequently, a campaign targeting five routes needs five distinct facing slips, each matched to the correct bundle. Mixing bundles or applying facing slips to the wrong route bundle sends pieces to the wrong streets — wasting postage on households outside your intended target area.
Furthermore, the USPS acceptance window at each post office runs during specific hours — typically not on weekends or after business hours. Many first-time mailers assume USPS acceptance functions like a standard drop-box. It doesn’t — plan your drop-off around these windows, especially for time-sensitive campaigns. For full submission logistics guidance, EDDM Bulk Mailing covers the operational framework for both EDDM Retail and BMEU submission at higher volumes.
Category 4 — Strategic and Campaign Planning Mistakes

Mailing to the Wrong Routes
Technical compliance gets your postcard delivered. Route selection, however, determines whether it reaches people who might actually respond. The most strategically costly EDDM mistake is saturating routes with no demographic alignment with your offer — mailing a luxury spa package to a low-income student neighborhood, or mailing a lawn service to a high-density apartment complex where residents don’t have lawns.
The USPS route selection tool shows median household income, average age, and residential versus business address counts for each carrier route. Use these filters to match route demographics to your customer profile. For example, a roofing company should target homeowner-dense routes, not apartment-heavy routes. Similarly, a restaurant promoting a weekday lunch special should target office-adjacent routes, not purely residential areas. For the complete route selection methodology, EDDM Mailing Routes is the dedicated strategic resource. Additionally, EDDM vs. Targeted Mail frames when EDDM’s saturation model is appropriate versus when list-based targeting produces better ROI.
No Offer, No Urgency, No Tracking
Three content errors waste budget even when the mailing goes through perfectly: no specific offer, no urgency mechanism, and no response tracking.
A postcard without a specific offer is a brochure. A brochure mailed cold to strangers has a near-zero conversion rate. It gives the recipient no reason to act now rather than later — or ever. Your EDDM postcard must include a concrete offer with a specific value proposition. “Award-winning service” is not an offer. “20% off your first visit through [date]” is an offer. That distinction determines whether your postcard generates calls or goes straight into the recycling bin.
Urgency without a deadline is equally ineffective. “Call today” without an expiration date carries no motivational weight — recipients assume the offer is always available and defer indefinitely. In contrast, a hard deadline — “Offer expires [specific date]” — creates the scarcity that converts interest into action. For design guidance on offer framing and urgency mechanics across specific business categories, EDDM Design Tips covers the full framework.
No tracking means no learning. An EDDM campaign without a dedicated phone number, QR code, or campaign-specific URL runs blind. You receive calls and visits but can’t attribute them to the campaign, can’t calculate a response rate, and have no data to inform whether and how to repeat the campaign. Tracking infrastructure costs essentially nothing to set up. It is the difference between a campaign that produces one result and a campaign that produces compounding returns across multiple drops. For the complete tracking setup framework, EDDM Tracking Results covers every attribution method in detail.
Ignoring Production Lead Times
One of the most budget-damaging EDDM mistakes is underestimating production lead time and missing the campaign’s intended delivery window. A seasonal promotion that needed to arrive before Memorial Day weekend, dropped at the post office on May 28, arrives after the holiday — with the offer window already closed.
Standard EDDM production requires 10–14 business days from approved file to in-home delivery: 3–5 days for design and file approval, 5–7 days for print production, and 1–3 days for USPS processing and delivery. During peak production periods — October and November for holiday campaigns, March and April for spring campaigns — press capacity tightens and lead times extend. Campaigns submitted during these windows without adequate lead time either miss the target in-home date or pay rush production premiums that erode campaign ROI.
Furthermore, the lead time clock starts from approved file — not from the moment you decide to run a campaign. Design revisions, approval cycles, and file correction rounds all consume days before a file reaches the press. Build campaign decisions at least 4–6 weeks before the intended in-home date. That’s the minimum for avoiding lead-time failures. For the full seasonal timing framework and backward-planning calendar, Best Time to Send EDDM maps production timelines against every major campaign window of the year.
Category 5 — Budget and Vendor Mistakes

Choosing a Vendor Based on Price Alone
The cheapest EDDM printing option is frequently not the least expensive when you calculate total campaign cost correctly. Online print-on-demand vendors that offer the lowest per-piece prices typically provide minimal prepress review — they accept and print files as submitted, and you only discover file errors when the physical cards arrive. A single reprinting of a 5,000-piece run due to an avoidable file error wipes out any per-piece savings from choosing the low-cost vendor in the first place.
Full-service EDDM printers — like CRST — review files for USPS compliance, resolution, bleed, safe zones, and indicia placement before any piece goes to press. This review layer is essential risk management for campaigns where the print investment is non-refundable. For campaign cost modeling that accounts for the full production cycle rather than per-piece price alone, EDDM Postcard Printing Cost and EDDM Cost and Pricing provide the complete budget framework. Additionally, the EDDM ROI Calculator models total campaign return accounting for both print cost and expected response — useful for evaluating vendor options on a total-cost basis.
For full-service EDDM support — file review, USPS-compliant production, route selection guidance, and postal submission assistance — contact CRST or request a campaign estimate. To see the full service offering, visit our EDDM printing services.
For businesses planning a first campaign, EDDM First Campaign Guide walks through every decision point with the context needed to avoid every mistake in this list before it becomes a budget problem.
Start Your EDDM Campaign with CRST
Avoiding the most costly EDDM mistakes — catching file errors before press, confirming size specifications before design begins, selecting routes by demographic alignment, and building tracking in from the first drop — is the single highest-leverage investment available before a campaign launches.
CRST handles EDDM printing from file setup through postal delivery, with a team that knows USPS compliance inside out and a track record across industries. Explore our full EDDM printing services to see how we support campaigns from first template to final delivery. Ready to move forward? Request an estimate or contact our team with your project details.
For the complete breakdown of how the program works, see our EDDM Guide.